Colour it - Create it - Show it off! March Challenge Reminder
Hey all!
So here we are half way through March already and just wanted to remind you to enter into the challenge where as usual it is anything goes, to enter and for more information click here. Absolutely loving the images I've been able to play with this month on the design team, so much I've made another 2 cards.


I cut down an A4 piece of super smooth card suitable for alcohol markers to give me a 6 by 6 inch square, I then took the time for tea designs scene it - stencil grass edge and my large green blender brush and using excess ink on the brush I created a grass panel along the bottom. Next onto the sunshine and using mustard seed along with my medium blender brush for specific colour, I used the middle of the scene it stencil for the sun and rays by doing half and then rotating the stencil to complete the other half of the sun.


Still using the scene it stencil this time the outer clouds edge with tumbled glass distress oxide and my blue large blender brush I created various layers of clouds using the various sides of the stencil. Following this I thought the edge of the sun rays looked quite harsh so I took the mustard seed blender brush again not added any more ink using what is already on the brush, I gently added further colour to the end of the rays to create a softer appearance.


With the background created, with the coloured image I fussy cut it out using my small scissors for most and using a craft knife for the inner bits that required cutting away, then added foam tape to the back.


However I felt the card still needed more to it hence I added the flower, ladybird, butterfly and grass verge with mouse and mushroom. At this stage I decided to leave a sentiment off the card so one can be added later or just a message inside would be sufficient.


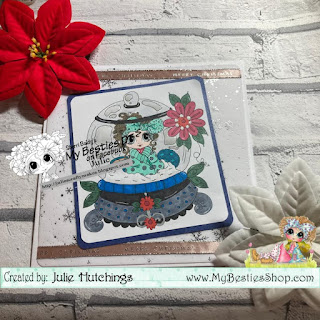
Onto the second card: I coloured in another image that I had pre-printed and cut down, using my Spectrum Noir Triblend brush pens - this time giving the fairy a pale skin complexion.

The fairy and bug image was then stuck onto the vellum slightly over lapping the dark pink frame but not too much as the pale pink from was then stuck down and covered up the slight over lap. Next I stamped the sentiment 'to a special friend', (which is from grateful for you landscape stamp set from Time for Tea Designs), in distress oxide tumbled glass onto white card which was then cut down with the stitch detail added using a black fine liner. The sentiment was then stuck down onto the inner part of the larger frame. The card still needed that little bit extra so I adhered using my glossy accents several scattered cosmic clear sequins, this completed the card.

Crafty hugs!
Julie xx


They are both beautiful 🥰
ReplyDeleteLove them both
ReplyDelete